
Eugenia’s Baked Cherry Jam
Tell people you preserve food–specifically, can it–and get a mixed response. People never know how to react to this information. Are you an adherent of some strange religion? Do you belong to a cult awaiting the end of days? Does a trapdoor in your yard lead to a bunker stocked with glittering jars of preserves?

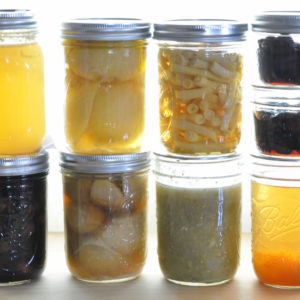
(Once upon a time this was our coat closet. I have put it to better uses.)
Readers who have spent any time in the IK–and if that’s you, thank you–know I enjoy canning. Also that I’m weird. Apart from that, my motives are entirely benign.

This brings us to cherries. Well, not quite. I started this post two weeks ago, then backtracked with a post about canning. Which baked cherry jam doesn’t require. Nor does it require specialty thermometers, pectin, or set tests. Nope, you just pop it in the oven, give it the occasional stir, and two hours later, voilà: jam.

All credit goes to Eugenia Bone. This is her recipe. Well, she says the recipe is Jacques Pepin’s. Regardless, I got it from The Kitchen Ecosystem, a wonderful book teaching the maximization of foods by eating some now, preserving some for later, and making all sorts of wonderful condiments, soups, and sauces from stems, shells, and peels–parts too often tossed. Eugenia, who I had the honor of interviewing for Popmatters, is an amazing cook and writer. Her books have improved my cooking a thousandfold, and will do the same for yours. Note my advance reader copy is falling to pieces. That bit at the bottom isn’t a photo error. Those are loose pages.

Of course, when it comes to cherries, you don’t have to do anything but eat them. When they appear at Berkeley Bowl, people do exactly that, sticking their hands into the bin and stuffing their faces. Berkeley Bowl attracts a mixed crowd, including the area’s wealthier citizens. Invariably, these shoppers are the rudest, sashaying around the organic section and sampling the wares as if it were a buffet. Last week several people had gathered around cherries, which sit in a huge raised box near the checkout. We were all quietly loading our bags when this guy tried shoving into each of our spots in turn. Why? Evidently he thought we were somehow robbing him of the best fruit. Never mind this box holds at least forty pounds of fresh cherries. Everyone–in fact, I think we were all women–silently stood our ground until he wandered off.

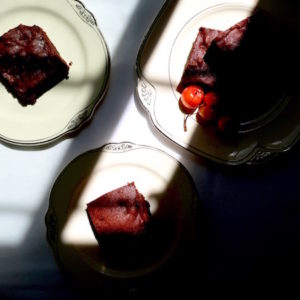
Not fond of jam? I’m not much of a straight jam eater myself. But baked cherry jam is a marvelous ingredient to have on hand. I fold it into ice cream, bake it into cakes and brownies, or serve a dollop of it with fresh fruit. The copious juices thrown off while baking are heavenly mixed with Armagnac and rum to create Cherry Bounce (I dare you to keep this around. I certainly can’t). And yes, I’m happy to offer recipes, but let’s wait, lest this post run any longer.
Baked cherry jam can be preserved in a water bath canner. I’ll include canning instructions in the recipe. The jam also holds in the fridge for about five days. Honestly, I’ve never tried freezing it. While not dangerous, I doubt this would freeze well: the fruit would likely become soggy and tasteless, a real shame after all that work.

Gratuitous final shot. Cherries are gorgeous.
Baked Cherry Jam
barely modified from Eugenia Bone’s The Kitchen Ecosystem
yield: 2 cups
1 pound sweet cherries, preferably organic
1 cup sugar
Preheat the oven to 200F.
Line a large, heavy baking tray with foil. This is important if you plan to make cherry bounce later, as it makes pouring off the fruit juice easier.
These cherries must be pitted. If you do not own a cherry pitter, this task can be accomplished using the flat side of a chef’s knife, with the blade facing away from you. Be warned that cherry juice will spray everywhere, and it stains. Wear an apron and old clothing. Avoid white curtains. Do pit on the baking tray, to catch all the precious juices.
Now pour the sugar over the cherries and tuck into the oven.
Bake, stirring the sugar periodically to ensure it dissolves. The cherries will dry up, wrinkle, and give off what seems enormous amounts of juice. This should take about two hours.
After about two hours, the cherries will look darker. The sugar will have completely dissolved. Don’t let the cherries or liquid burn. Lift tray out carefully to avoid spilling liquid.
What you do next depends on whether or not you intend to can.
Scenario #1: You are not canning:
Transfer cherries to a refrigerator-safe lidded storage vessel. Allow the fruit to cool a little before refrigerating no longer than five days.
Scenario #2: You are canning:
While the cherries bake, prepare your water bath canner.
Place canner on stove. Put the rack in. Fill to mark indicated on manual (I know, I said I hate this, but canners vary: on my canner, this is raised round band about four inches below the top). Turn the burner to low. This starts warming the water.
Sterilize three half-pint jars by washing them in hot, soapy water. Rinse well in hot water. I hold jars with tongs and run them under hottest tap. Dry either in dishwasher cycle or as I do, in the oven on lowest setting. I like to wash bands and lids, too, before placing them in a small pot of hot water.
Wash a ladle and funnel. Have white vinegar and clean rags or paper towels ready to wipe the jar rims.
When the cherries are finished baking, ladle them into the jars, leaving 1/2 inch headspace. See that glass band running around the top of the jar in my photos? That’s the 1/2 inch mark. In the photo, the middle jar isn’t filled to the 1/2 inch mark . You can get away with this, but an overfilled jar won’t seal properly. For more information on filling jars, see notes.
Wipe jar rims with rag or paper towels dipped in white vinegar. This cleans any drips and helps ensure a good seal.
Screw on the lids fingertip tight. “Fingertip tight” means you won’t need to call professional wrestlers to open your jars in three months. Place jars in waterbath. A tool called a jarlifter does this safely and cheaply. Put on the canner lid–something I often forgot in my early canning days–and crank up the heat. When the water reaches a full, rolling boil-you can peek–start timing. This jam needs 15 minutes. If you are a forgetful or distracted type, set a timer.
Once the 15 minutes are up, turn off the heat. Allow the jars to rest for 5 minutes, then remove them from the canner. Don’t leave them there for hours; they’ll overprocess.
It’s a good idea to place them on a wooden surface like a cutting board to cool. Don’t rest them on a cold surface: they’ll crack.
You’ll hear the lids go “thuck!” That’s a good noise. It means they’re sealing.
Allow your jars to cool at least 8 hours. Overnight is even better. Test seals by picking up jars with your fingertips, lids only. Lids should be firmly affixed.
If seals fail–you can get them off using just your hands, easily–you can reprocess, or refrigerate the jam. All will be well.
Notes: Cherries can be refrigerated 24 hours between baking and canning.
On filling jars: If you don’t have enough jam to fill the third jar more than halfway, refrigerate it. I have successfully canned jars that are half or three-quarters full. Don’t try below that. If you have 4 ounce jelly jars around, you can use those, but follow the 15 minute canning time.
Jam is best eaten within a year, but will keep beyond that providing the seals are good. Cherries at the top may darken over time. That’s fine. They’re good to eat.
Obviously, if food shows any signs of spoilage–fizzing, discoloration, bad smells, throw it out.
To make this jam using strawberries: follow exactly, but bake for one hour, thirty minutes.

Share:
You might also like:
On Canning
A few words on safe canning practices might be useful as we move into spring. Today’s post is an overview, as a comprehensive lesson would be overwhelmingly long. As it is, this post is already too long. Sorry for that. But I had a post on cherry jam all ready to go,…
Notes on Canning Tomatoes
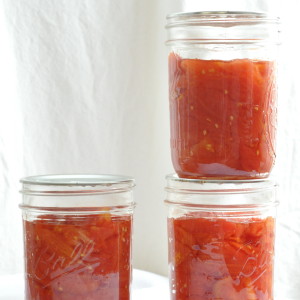
The literature of canning abounds in talk of capturing time. Terms like “peak freshness”, “seasonality”, and “ripeness” are certain to appear whenever people begin musing over the meaning of canning. It’s all true. To can tomatoes in August is to hope you’ll be opening the jars in February. To gaze upon…
Cherry Chocolate Brownies
Apologies for the delays between posts. Until last month, I managed a long-term case of patellar bursitis with regular cortisone injections. My doctor warned these shots would eventually become refactory. Eventually has arrived. It means delays between posts. — Let’s talk about cherries. They are in season, and of course,…
