
Miniature Chocolate Cakes
Years ago, while writing an article on holiday cookies, I consulted The Martha Stewart Living Christmas Cookbook. Stewart assume a readership whose kitchens are stocked like a Sur Le Table outlet: cake pans in every possible size and shape, pizza stones, candy thermometers, pastry bags, sugar combs, a willing staff ready to clean up the mess.
Incensed, I slammed the book shut. Who has a kitchen like that?

Clearly not me.
Now here I am, posting a recipe calling for 36 tartlet molds.

These molds, made by Norpro (who do not know I exist), came from Ace Hardware, where they cost a mere $8. A quick internet search found them at Etsy, Walmart, and a certain enormous purveyor threatening world domination. This is not pictured.

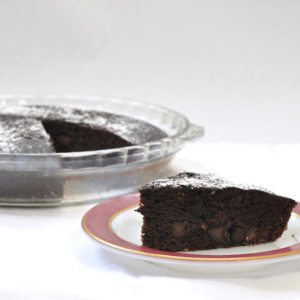
Assuming you’re still reading and refuse to buy more bakeware, take heart: this recipe is incredibly flexible. Bake it in a nine-inch springform, bottomless two-inch molds, small pie pans, or the miniature cake molds. All work.

The recipe is adapted from Helen Goh’s justly famous Take-Home Chocolate Cake, which appears in Sweet.

This is a great recipe for the novice and/or fearful baker. Chances are good you have at least one of these baking pans collecting dust. May I repeat: no standing mixer required. Further, this batter is nice and sturdy: no creaming sugar and butter, no whipping egg whites, no hurrying the finished product into the oven lest it deflate. This cake, both raw and baked, is extremely good-natured. Need to hit the restroom? This cake will wait patiently, smiling in its bowl. Just wash your hands, okay?

Then, of course, there’s the taste. Miniature chocolate cakes have the perfect ratio of sugar to chocolate, meaning they’re more about chocolate than cloy. Children probably won’t like these, unless you frost them (the cakes, not the children). Their diminutive size makes these cakes rich without being heavy. Unless you eat a dozen in one sitting. Which is inadvisable.

Miniature Chocolate Cakes
Adapted from Helen Goh and Yotam Ottolenghi’s Take Home Chocolate Cake, from Sweet.
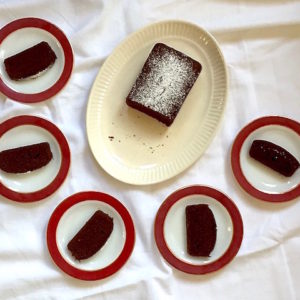
Yield: 1 nine-inch cake, 4 five-inch cakes, 15-20 two-inch cakes (approximately 3 inches high) or 36-40 miniature cakes, approximately 2 ounces each.
Baking times: 1 hour for 9-inch cake, about 25 minutes for five-inch pie pans, 12-15 minutes if using two-inch or miniature cake molds.
Please read the notes before baking.
Ingredients
17 1/2 tablespoons /2 sticks +1 1/2 tablespoons/250 grams unsalted butter, at room temperature
7 ounces/200 grams dark chocolate, chopped very, very finely
1 1/2 teaspoons instant coffee or espresso, dissolved in 1 1/2/350 grams boiling water
1 1/4 cups/250 grams white sugar
2 large eggs, at room temperature, whisked lightly
2 teaspoons almond extract or Amaretto
1 3/4 cups/240 grams self-rising flour (see notes to make your own)
1/3 cup/30 grams Dutched cocoa powder, preferably Drostë
1/4 teaspoon salt
softened butter, for the baking molds
Baking Instructions
Preheat the oven to 350F/170C
To bake these cakes, you will need 36 small baking or tart molds, two bowls, one of them microwave-proof, and two large baking trays. I use a two-tablespoon measure to scoop the batter into the molds.
Lavishly butter the molds, being sure to reach all the nooks and crannies in each design. Your clean fingers are the best tool for this task. Set the molds aside.
Make the cake batter:
If you have not chopped the chocolate, do so now and place it in the microwave-safe bowl.
Dice the butter into small squares and add to the chocolate.
Heat the instant coffee and water to boiling hot. Carefully pour coffee over the butter and chocolate. Stir continually with a large spoon. Ideally, the hot coffee will melt the chocolate and butter on contact, blending ingredients into a smooth batter. No? Butter still lumpy? Chocolate still in gobs?
Place the bowl in the microwave on 10-second bursts, stirring between. The ingredients should come together quickly.
Now add the sugar to the bowl, stirring until blended. Add the eggs and almond extract, stirring to blend. Set aside.
In your second bowl, using a large whisk, blend the flour, cocoa powder, and salt. Add to batter and stir to blend. Batter will be dark and very liquid.
Have a baking tray at your side. Using a two-tablespoon measuring spoon or something comparable, spoon batter into molds. You want the batter spooned right to the top of mold. Place filled mold on baking tray. Continue until tray is filled. (See photo, above.)
Slide tray into oven and bake cakes, 12-15 minutes. Cakes are baked when a toothpick comes out clean and tops spring back to touch. Cakes will look done, with smooth, slightly domed tops. If your collection includes smaller molds, expect these cakes finish 2 minutes sooner.
Remove cakes to rack and allow to cool about five minutes before unmolding. I find cakes tip out easily by turning upside down and shaking gently.
Allow cake molds to cool a few minutes before refilling and baking a second round. Molds do not need to be re-buttered.
Allow cakes to cool completely, about 2 hours, before either storing or sprinkling with confectioner’s sugar.
Miniature Chocolate Cakes may be stored in a resealable plastic bag, 4-5 days at room temperature. They also freeze beautifully. We’ve never kept them longer than a month, but they’re wonderful at least that long.
Notes:
An inexpensive digital scale that toggles between metric and imperial measures will improve your baking life. Scales also rationalize a measurement like 1 and 3/4 cups + 2 tablespoons: the metric equivalent is 240 grams.
To make self-rising flour at home, follow Yotam Ottolenghi and Nigella Lawson’s formula of adding 2 teaspoons of baking powder to one cup+2 teaspoons all-purpose flour. For this recipe, add 3 and 1/2 teaspoons baking powder to 1 and 3/4 cups+2 tablespoons of flour.
Helen Goh’s recipe calls for two teaspoons of vanilla. I’ve used almond extract and Amaretto successfully in this recipe. Take your pick.
To avoid messy drips, hold the cake mold over the batter bowl when spooning batter into it, rather than moving a full spoon between bowl and tray. This sounds silly, but I can’t be the only one who learned the hard way.
If you are baking cake in round 2-inch bottomless molds:
My metal molds were acquired secondhand. Both buttering and lining them with parchment proved unnecessary; the cakes popped out without any greasing. Not sure how your molds will work best? Bake a few test cakes. The worst result is you’ll need to run a thin knife or heatproof spatula along the inside to loosen your cake.
Follow baking instructions, placing molds on a parchment-lined baking sheet. Fill each mold to halfway mark; overfilling may cause underbaked cakes. Test cakes for doneness at 10 minute mark.
Baking in a nine-inch springform pan: (directions from Sweet Cookbook)
Butter the bottom and sides of the springform, then line it with parchment. Be sure to set the pan on a baking tray, so any leaks are contained. Bake cake for 1 hour. Cake is done when toothpick comes out clean. Cool on rack.
To wash cake molds
Soak molds in a large bowl of warm soapy water. A few drops of white vinegar help cut grease. I allow them to soak overnight. Later/the next morning, gently wipe clean with a toothbrush or other small brush. This makes cleaning up easy.

Share:
You might also like:
The Wacky Cake: Not My Grandmother’s Bundt
Bill LeBlond, editorial director of Chronicle Books, once told a crowd at a cookbook proposal seminar that if he had to read one more book proposal from people who learned about cooking at their grandmothers’ knee, he would throw up. Dianne Jacob, Will Write For Food I spent a lot…
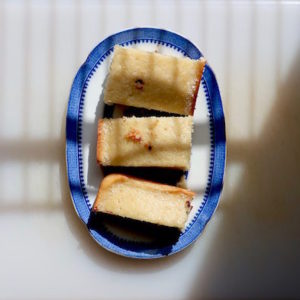
David Lebovitz’s Cocoa-Marzipan Pound Cake
Long before David Lebovitz became David Lebovitz, he wrote a little book–literally, it’s not even 8 x11–entitled The Great Book Of Chocolate. Within The Great Book Of Chocolate resides a recipe for Cocoa Marzipan Pound Cake. Cocoa-Marzipan Pound Cake is full of ingredients that make it a resoundly unphotogenic brown:…
Wacky Cake Revisited
As more people are vaccinated and lockdowns lift, social life is gradually resuming. People are once more gathering and eating together. Sooner or later, you may be invited someplace, and you may be asked to bring a dessert. Many people, rightly or not, find the entire business of baking anxiety-inducing….
