
Black Bread
So lovely to be back. Thank you for your support, and for being here. For the moment, I am happily puttering in the kitchen.
—
Apart from potable drinking water, the Detroit of my childhood featured marvelous Jewish bakeries where fresh challah, pumperknickel, and rye breads were a given.These bakeries were staffed by Eastern European refugees, many, if not all, Holocaust survivors. When the counter ladies handed over your freshly sliced loaf, their sleeves slid back, revealing blue tattooes.
A move to Los Angeles, in 1985, abruptly introduced me to the indignities of awful bread.
Eleven years later, for this and many other reasons, I fled to Northern California, where I happily ate the sourdoughs and levains made famous by Steve Sullivan’s Acme Bakery. While wonderful, these French-style breads are a far cry from the Jewish loaves of my childhood. The sickly, overly sweetened loaves masquerading as California challahs are deeply confused creatures thinking themselves cakes. Meanwhile, the hearty ryes and pumpernickels of my childhood reside only in memory.
All to say, to eat them, I’ll have to bake them. Black bread doesn’t quite fit the bill, lacking the sourness obtained only from starters. But John, hardly a participant in my bread mania, asks for this bread by name. When I suggested fussing with it, he looked mournful. Clearly more black bread recipes are necessary.
Meanwhile, don’t let the ingredient list discourage you. Once you’ve assembled everything, it pulls together quickly. And after you’ve baked black bread a couple times–and I promise, you will want to bake this again–it becomes simple. If you aren’t photographing every little ingredient, you can assemble this using two measuring cups, a pot, and a couple bowls. Another nice thing about black bread is the quick rise time: a couple hours gives an amazingly complex result. Meaning you aren’t beholden to it all afternoon. Unlike the Superbowl.
This recipe comes almost entirely from Diana Henry’s A Change Of Appetite. I left out the grated carrot, as I forgot it once and the bread was divine without. I’ve also left out sesame seeds. Should your dental situation be better than mine, feel free to sprinkle some atop the loaf just before sliding it into the oven.
Before beginning, read the recipe through and decide how you’d like to proceed. You can do a classic mise en place, measuring each ingredient into a separate dish, but it’s not necessary. Better to break the process down into five parts, detailed in the instructions. Roughly:
- make the sponge: mix 1/3 cup rye flour with water, yeast, and brown sugar
- while that proofs, mix the remaining rye flour in a bowl with the salt and bread flour
- mix the remaining ingredients in the larger measuring cup you’ve already used above. Once the sponge is ready,
- knead into a loaf, allow to rise and
- bake bread.
I am utterly incapable of adding in my head and stumble over “will this amount of water fit into that beaker?” Meaning: if I can manage to conceptualize the above, anybody can.
Black Bread
minimally adapted from Diana Henry’s A Change In Appetite.
Yield: One Large Loaf
Preparation Time: approximately 3 hours for mixing and rising, 40 minutes for baking.
1 1/2 cups rye flour (see note)
1 cup water
2 1/2 teaspoons active dry yeast
1 tablespoon packed brown sugar
3 cups bread flour (see note)
2 teaspoons salt
2 tablespoons unsweetened cocoa (for baking, not drinking)
2 tablespoons instant coffee granules (I use instant espresso from a jar)
1/4 cup molasses
4 teaspoons caraway seeds
3 1/2 tablespoons unsalted butter
1/2 cup warm water
peanut oil, for oiling counter and bowl
sesame seeds, for top of bread (optional)
This recipes has multiple steps, but none are difficult. There are plenty of stopping points where it’s advisable to put ingredients away and/or clean up as you go, making life easier and the entire bread-baking experience more pleasureable.
Begin by measuring one cup of cold water and adding it to a small, lidded pot. Bring it to a boil.
Dry the measuring cup thoroughly. Measure 1/3 cup of rye flour from the 1 1/2 cups into it.
Turn off the burner and add the 1/3 cup of rye flour. Stir with a fork. It will a lumpy mess that looks and smells rather like oatmeal:

Ugly, right? This is our sponge. But it needs to cool, so the hot water doesn’t kill the yeast. This should take about fifteen minutes. Move the pot to a cool burner, and turn your attention to the flours.
Tip the remaining rye flour, bread flour, and salt into a large bowl.

Wash the gloopy fork. Now test your flour/water mixture to ensure it’s cool enough to add the yeast. You should be able to easily stick your (clean) fingertip in–i.e.–warm, not hot. Ready? Add the yeast along with a teaspoon of the brown sugar, taken from the packed tablespoon. It will still be ugly:

Now plunk the lid on and let it sit someplace for 45 minutes.
While the yeast snacks on brown sugar, rinse and dry the measuring cup. Now use it to add the remainder of the brown sugar, cocoa powder, instant coffee, molasses, caraway seeds, and butter.

Pour the half cup of warm water–20 seconds in the microwave will do, or hot tap water–and stir with a spoon or fork. It will look horrible but smell distinctly chocloately. Don’t fret if the butter doesn’t melt. That’s why we’re kneading later.

Okay, in a perfect world, you’ve cleaned up your kitchen, 45 minutes has passed, and you’re ready for the next step.
Lightly oil a countertop or the workspace you use to knead bread with about a tablespoon of peanut oil.
Make a well in the flours, and pour the yeast mixture into it. You might help it along with a spatula.

Pour in the contents of the measuring cup, and mix with either a wooden spoon or one hand. I prefer my hand, in a “claw” shape. Mix the dough until it’s shaggy and sort of holding together. Flour will still be loose at the bottom of the bowl. It will look like this:

Dump the contents on to your oiled work surface and knead for ten minutes.

The original recipe states this can be done in a mixer, using a dough hook, for five minutes. I’ve never used the mixer, preferring to do it myself and take a break if necessary. This is a dough that will fight back, so it’s okay to take a break, allowing the gluten to relax.
Form into a loaf with the seam side down.

Oil the dough lightly. Place in an oiled bowl and cover with a lightly oiled piece of plastic wrap. Leave in a warm place for an hour.

An hour later…

The transformation from loose flour to this in an hour never ceases to amaze me.
Punch the bread down and knead it for thirty seconds. Form it into a loaf, seam side down. Place it on a lightly oiled heavy baking sheet and cover with the plastic wrap for another hour.
Heat the oven to 425 F.
When it’s time to bake, brush the loaf with water. Add the sesame seeds, if desired. Now deeply slash the loaf–called docking–with a serrated or extremely sharp knife in a cross. It’s a shame to cut into this beautiful loaf, and I once forgot this step with no ill effects. Do it anyway.

Bake at 425 for 20 minutes, then turn the oven down to 350F. Bake for an additional 20 minutes. Bread is ready when a thump on the bottom sounds hollow.
Cool completely on a rack before slicing or eating. Bread fresh from the oven is utterly indigestible.
A Change Of Appetite pictures this bread with caviar. More prosaically, we eat it with politically correct smoked salmon and butter (him) or cream cheese (me). It’s also lovely with goat cheese, pictured below.

Note:
I’ve used Bob’s Red Mill Rye Flour for about a year now, and my sole complaint about this impeccable product is I can only find 22-ounce bags of the stuff commercially, and that only in a few stores. The website sells by the case–4 22-ounce bags for the excellent price of $12 bucks, and I’ll admit to sore temptation here.
According to the King Arthur Flour website, bread flour is higher in protein than all-purpose flour, permitting a better rise but also requiring more liquid. I’ve baked this bread and others with both bread and all-purpose flours, and had fine results. In terms of needing more or less water than a recipe calls for, this is truly a function of the weather, the heat and humidity in your kitchen, and your flour. Knowing how to gauge this comes with experience; trust your judgement. While kneading this loaf, I noticed it cracking. The weather was dry and unseasonably warm, so I oiled my hands–remember this recipe calls for an oiled countertop–and continued kneading. If you are a frequent bread baker, bread flour is worth the money. If bread is only an occasional pastime, all-purpose is fine.

Share:
You might also like:
Fast Flatbread
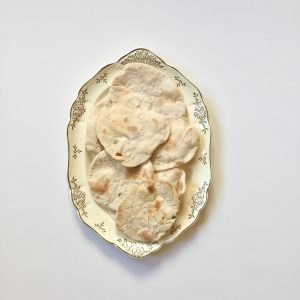
I can’t tell you how often I’ve searched my cookbooks for the ideal flatbread recipe. By ideal, I mean a recipe you can mix, roll, bake, and eat in under an hour. Further, this recipe must use pantry ingredients and have a low yield. Why a low yield? We are…
Baps (Scottish Breakfast Rolls)
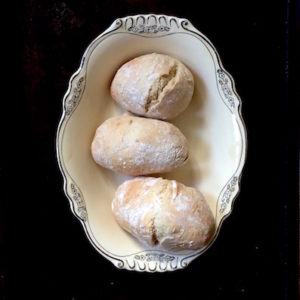
A bap, if you are wondering, is a Scottish breakfast roll. The recipe below comes from Elizabeth David’s English Bread And Yeast Cookery, published in 1977. David, never one to mince words, rails against the state of English bread. If your copy has American notes by culinary historian Karen Hess,…
Sourdough Scones

The IK not a news site. Nor am I a pundit. That said, blithely nattering on about sourdough scones after a week like the one we’re concluding feels heartless indeed. So, let us acknowledge what a hell of a week we’ve had, as a world, as a nation, as individuals. In…
